Goal Forge → Shape and build your goals step by step
How to Use the App
1. Check Server Status
- Green: The server is ready.
- Red: Wait until it turns green before proceeding.
- ⚠️ You cannot sign in while the server is red.
- ℹ️ This happens because the app is hosted on Render’s free tier, which puts the server to sleep when inactive. It may take a short time to wake up.
2. Sign In (Optional)
You can use the app without signing in, but your goals will only be saved locally.
To save goals to the cloud and sync across devices:
- Click "Sign in with Google".
- If you already have local goals, you’ll get these options:
- Append – Add your local goals to your account.
- Reset – Replace local goals with your server goals.
- Skip Import – Ignore local goals and continue with your account goals.
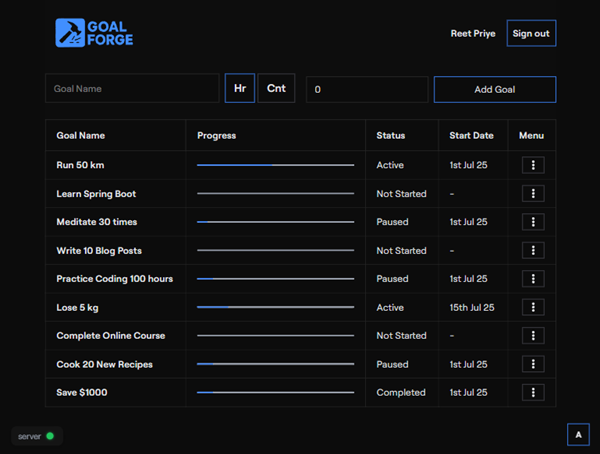
3. Add a New Goal
- Enter your goal’s name.
- Select the type:
- Hr: Track by hours (e.g., "Study 20 hours").
- Cnt: Track by count (e.g., "Read 10 books").
- Enter the estimated effort (e.g., 20 hours or 10 books).
- Click "Add Goal".
The new goal will appear with the status "Not Started".
4. Manage Goals
Open the menu (three dots) next to a goal to:
- Start – Begin tracking progress.
- Pause – Temporarily stop tracking.
- Resume – Continue tracking after pausing.
- Complete – Mark the goal as finished.
- Delete – Remove the goal permanently.
5. Log Progress
- Click on a goal to log your daily progress.
- Enter how much you’ve completed.
- The progress bar will update automatically.
- You cannot log for previous days. This has been kept because we want users to keep checking this app daily, so that it helps them to be on track.
6. Personalize the App
- Use the color switcher in the bottom-right corner to change the app’s accent color.
There are tons of goal tracking apps. But the motive of this app is to keep it minimalistic and have only required functions.